How to Draw an Airplane Step by Step
This guide shows how to draw an airplane in twelve steps. It provides clear, step by step illustrated examples and easy to follow instructions.
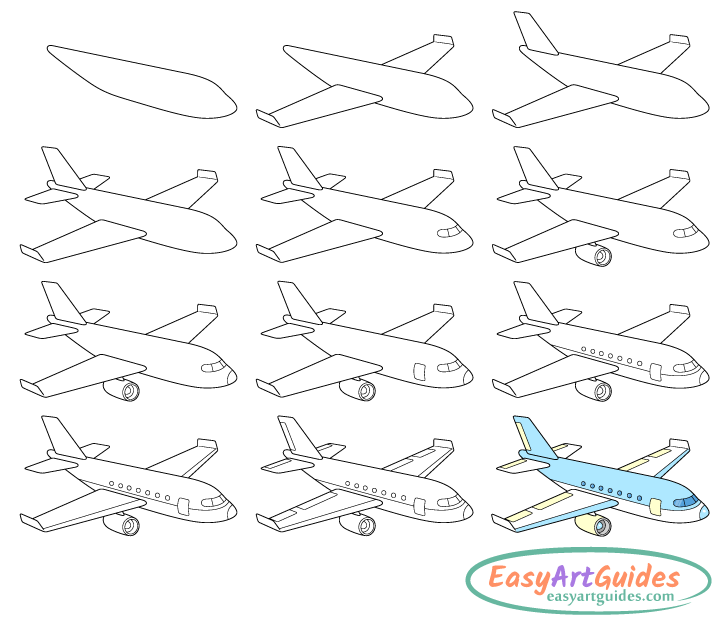
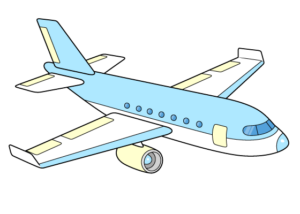
The airplane in the example a passenger jet drawn from 3/4 view. The illustrations are done in a somewhat simplified style to make the tutorial beginner friendly. However, the plane is still drawn with most of the parts such aircraft commonly have. The guide shows how to build up the drawing starting from the airplane’s largest sections such as the fuselage and going down to the smaller details such as the portholes (windows) and various wing parts.
You should begin the tutorial in pencil and make light lines as you will need to erase parts of the drawing in a few of the steps. You can trace over your drawing with darker pencil lines or a black pen/marker once you have the entire airplane outlined.
Step 1 – Draw the Fuselage of the Airplane
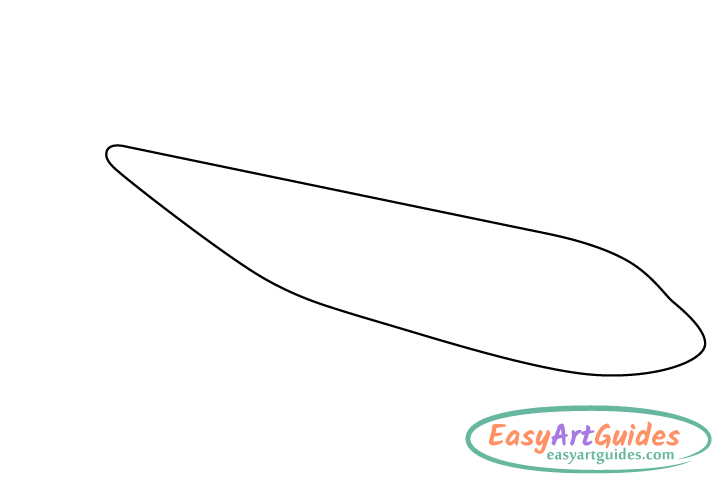
Start by outlining the main body of the airplane (the fuselage). As already mentioned, in this example the airplane is shown in 3/4 view. When drawing it from such an angle you will want to make the fuselage narrower as it goes into the distance to show perspective (objects appearing smaller the farther they are in the distance).
Draw the underside area near the back rising towards the tail. This should make the fuselage get even narrower as it goes towards the back of the airplane.
At the front of the fuselage outline the nose and the cockpit area. Make the nose rounded with a smooth transition from it to the underside of the cockpit, Define the upper part of the cockpit with yet another curve with a bit of an indent between it and the nose.
Step 2 – Draw the Wings
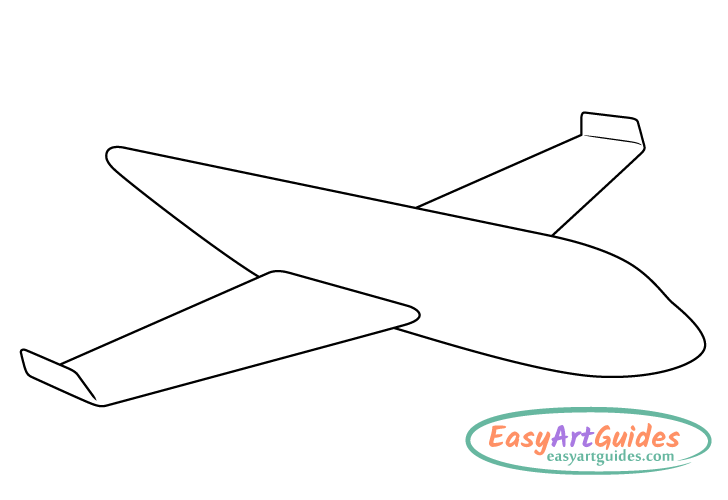
Onto the fuselage add the airplane’s wings. In this case the front sides of the wings are angled backwards making them narrower as they go out.
Draw the wing in the foreground (closer to the viewer) overlapping the outline of the main body. You can erase part of the drawing from the previous step when adding it in.
Keep in mind that the base of the wing in the background is hidden behind the airplane. Make it’s visible part smaller than the same area of the front wing to again accommodate for perspective.
Step 3 – Draw the Tail (Vertical Stabilizer)
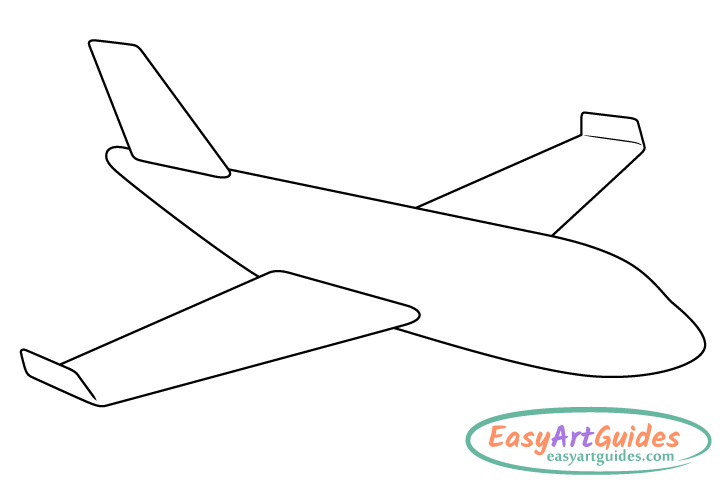
Add the airplane’s “tail” called the vertical stabilizer at the upper back of it’s body. Draw the stabilizer in leaning backwards and make it wider at the bottom and narrower as it goes up.
Step 4 – Draw the Tail Wings (Horizontal Stabilizers)
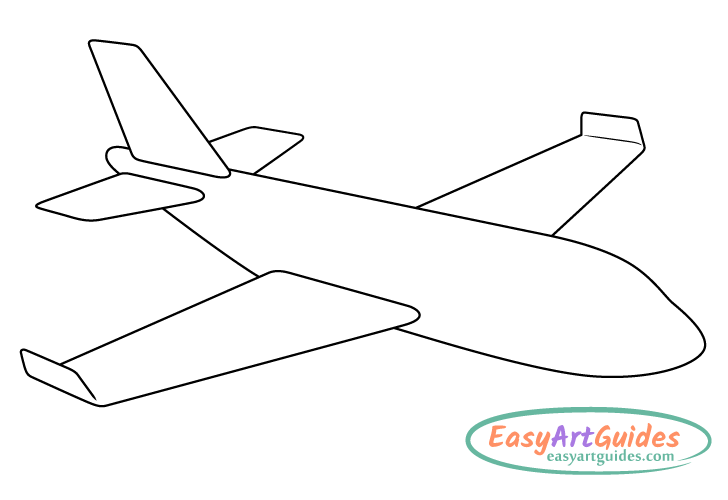
At the back of the plane (below the “tail”) draw the “back wings” (called the horizontal stabilizers). Similar to the front wings make the one closer to the viewer larger and the one in the background smaller. Again, you will need to erase part of the fuselages outline when adding the foreground stabilizer.
Step 5 – Draw the Windshield
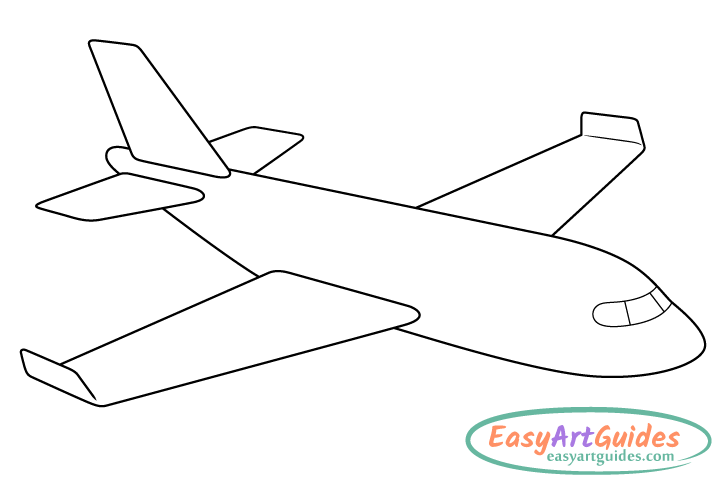
At the front of the cockpit draw the windshield. Make it long and narrow curving around the front of the plane. After outlining it’s main shape draw in some separators to show that the glass is split into several sections.
Step 6 – Draw the Engine
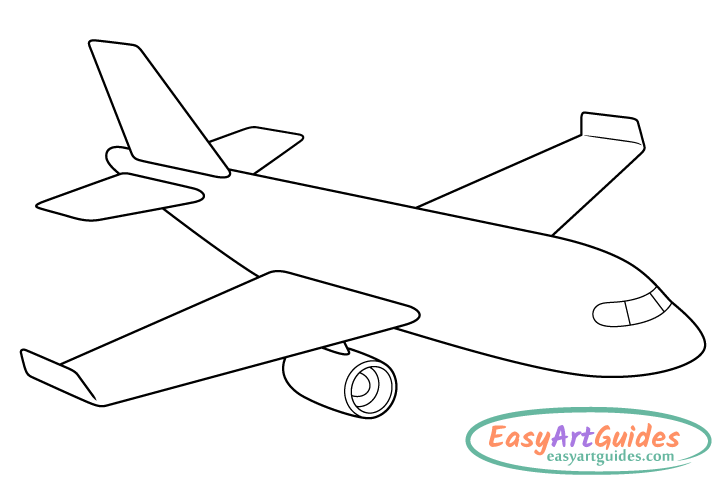
When viewed from the angle shown in the example one of the airplane’s engines will be hidden behind the fuselage. Draw the visible engine below the foreground wing. Position it slightly closer to the main body of the airplane than to the outer end of the wing.
Make the engine’s overall shape similar to a barrel. Draw a rim around it’s opening and inside it draw the spinner surrounded by the blades. When the blades are spinning they will look like one solid shape and you can draw them accordingly (as in the example).
Step 7 – Draw the Nose Cone
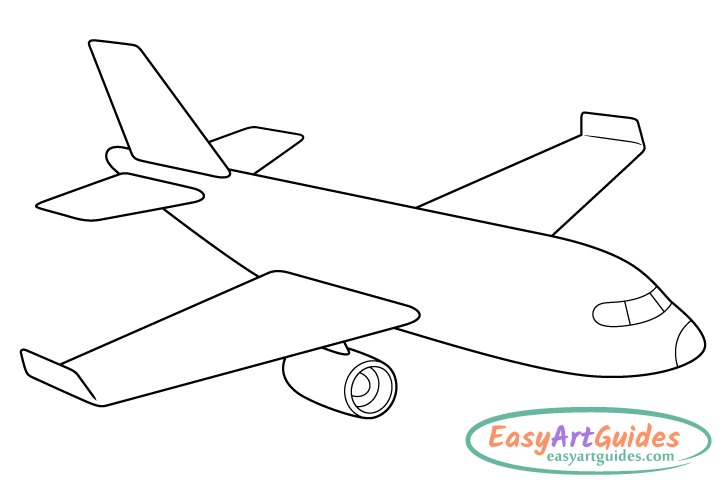
For this very easy step define the nose cone. Simply outline with a single curve
Step 8 – Draw the Door
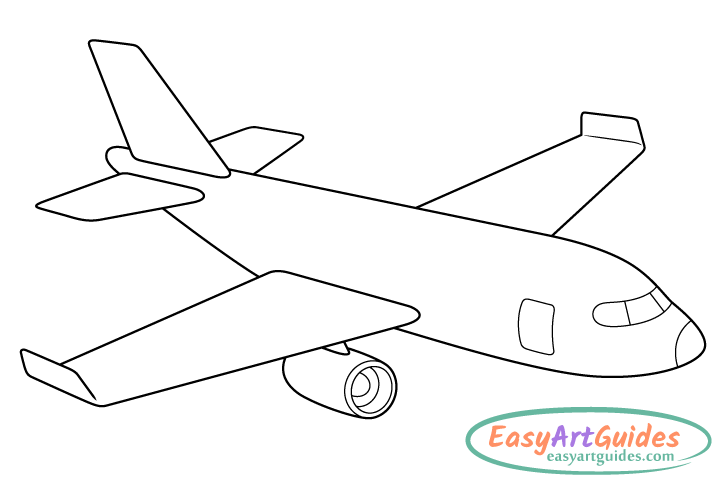
On the side of the fuselage draw the door. Position it just behind the cockpit. You can define the door’s top and bottom with pretty much straight lines but make it’s sides curve to show the curvature of the fuselage. Also, give it rounded corners (as is common for airplane doors).
Step 9 – Draw the Passenger Windows (Portholes)
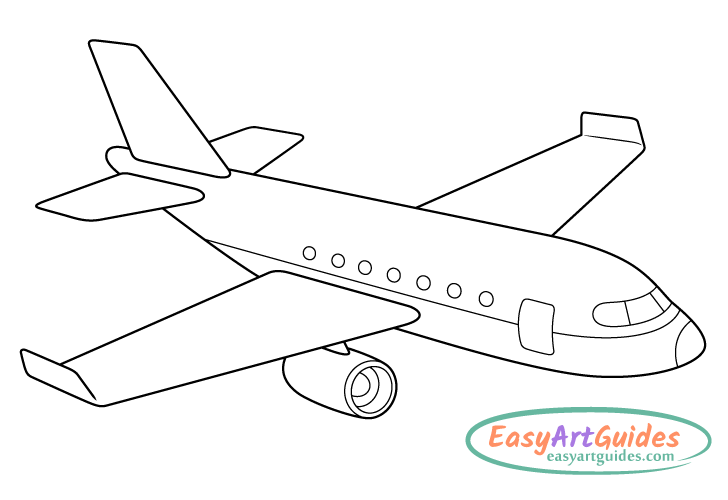
Draw a line starting from just below the windshield and running all the way to the back of the airplane. Above this lines draw the portholes (the plane’s passenger windows). Add the portholes starting from a little bit past the door and running to roughly the end of the wing.
In this case the plane has circular shaped portholes but you can draw them slightly oval in shape to show that they are being viewed on an angle. Also draw the portholes slightly smaller as they go towards the back of the plane to once again account for perspective.
Step 10 – Draw the Wing Edges
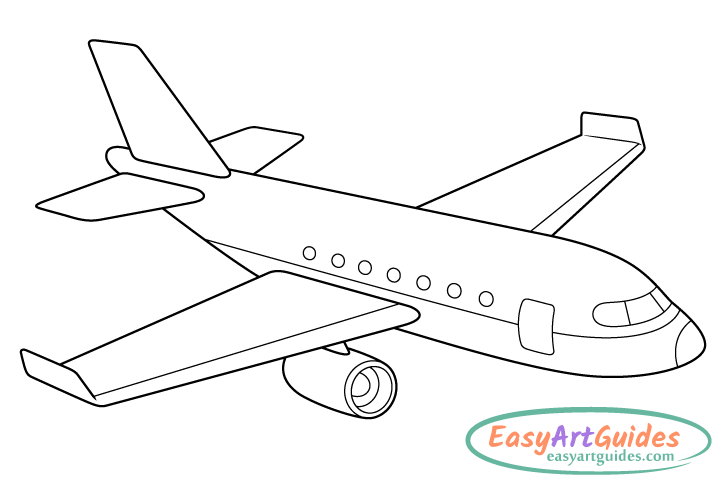
On the front of the wings define their forward edges. Draw these running along the entire length of the visible part of each wing. Similar to the wings themselves make the edges wider at the base and narrower near the ends.
Step 11 – Draw the Flaps, Ailerons, Elevators & Rudder
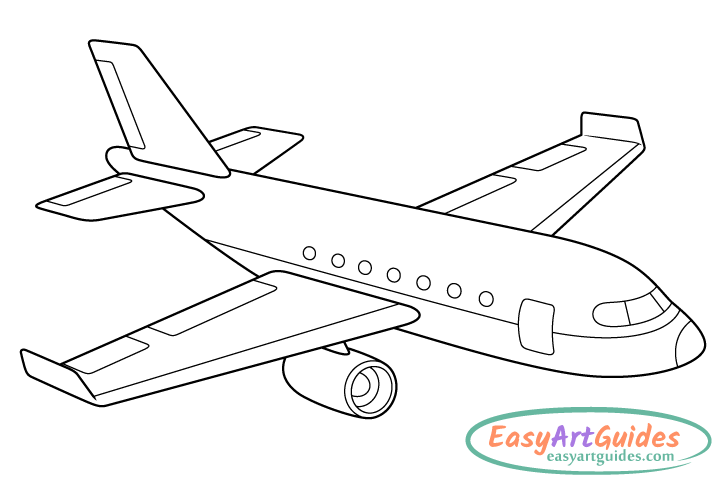
These may seem like a lot of parts to add in one step but if you look at the example you can see that they are all quite simple and look almost the same.
Along the backs of the wings draw the flaps (closer to their inner ends) and ailerons (closer to their outer ends (as shown in the example).
Along the back of of each stabilizer (tail wing) draw an elevator and along the back of the vertical stabilizer (tail) draw the rudder.
Once you have these last parts of the airplane outlined have a look over your drawing to make sure everything is in the right place. If so, trace over your lines to darken them. You can either do it with the pencil or by using a thin black marker.
Step 12 – Color the Plane Drawing
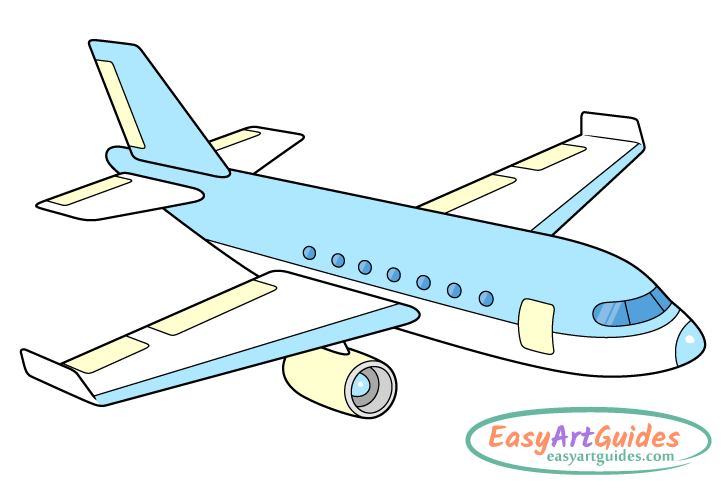
To color the plane you can pretty much use any color combination you like. In this case it’s white, yellow and light blue with a little bit of darker blue used for it’s glass parts and some grey for the engine.
Please note that before coloring you may wish to outline a reflection on the nose cone and spinner as well as some reflections along the windshield and portholes. Leave these white or make them a lighter color to help show that these areas of the plane are particularly smooth and reflective.
Make the reflections along the nose and spinner oval in shape. Draw the reflections on the windshield as a pair of streaks and define the reflections on the windows as an angled section on their sides.
To color the airplane as in the example you can do it as follows:
- Tail (horizontal stabilizer) – light blue
- Upper part of the fuselage – light blue
- Front edges of wings – light blue
- Nose cone – light blue (leave reflection white)
- Spinner (inside engine) – light blue (leave reflection white)
- Rudder, elevators, ailerons and flaps – yellow
- Door – yellow
- Outer engine area – yellow
- Engine rim – light grey
- Inner engine area – medium grey
- Engine blades – dark grey
- Portholes – dark blue (with lighter blue reflections)
- Windshield – dark blue (with lighter blue reflections)
Leave the other areas of the plane white.
An easy way to apply the color is by using colored pencils and/or markers . You can use a regular pencil for the greys. Simply apply more or less pressure to get the lighter and darker variants.
Conclusion – A Good Approach Can Make Drawing an Airplane Easier
An airplane is a fairly detailed aircraft and drawing one can be somewhat of a challenge. To make things easier this guide presents a somewhat simplified example of one and provides a logical step by step approach to drawing.
Properly managing the drawing process such as starting with the largest and most important parts of the airplane can help you avoid needless erasing and backtracking. This in turn can help you create better looking artwork with less hassle.
For other similar tutorial also see:


