How to Draw a Strawberry in 4 Simple Steps
This short four step tutorial shows how to draw a strawberry. It can be good for beginners who want to practice by drawing something nice and simple.
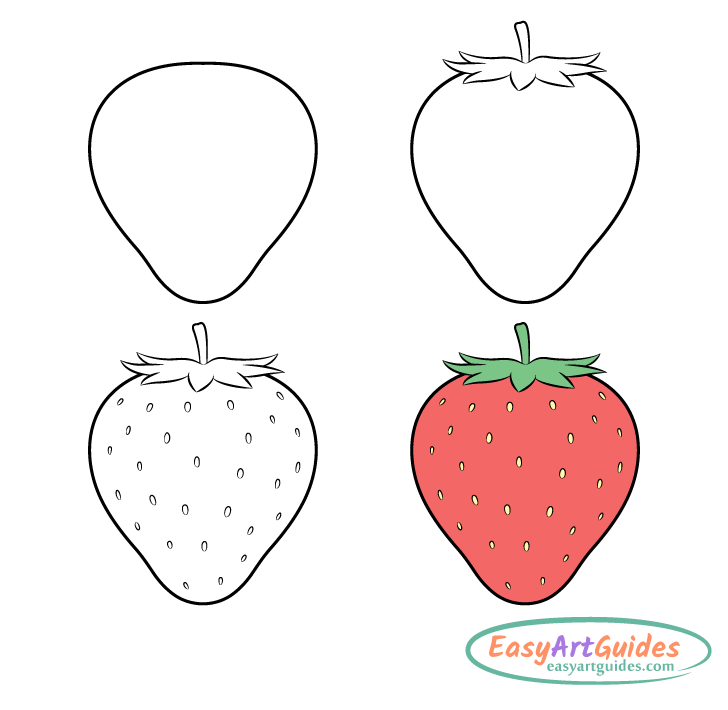
The strawberry shown as an example in this tutorial should be quite easy to draw even if you are a beginner. Just follow the steps carefully. You can see the preview of them in the image above.
Start the tutorial in pencil and make light lines. This will both make it easier to correct mistakes and allow you to erase a little bit of the drawing, which you will need to do in step two. You can darken them later on with a black pen or marker.
Step 1 – Draw the Outer Shape of the Strawberry
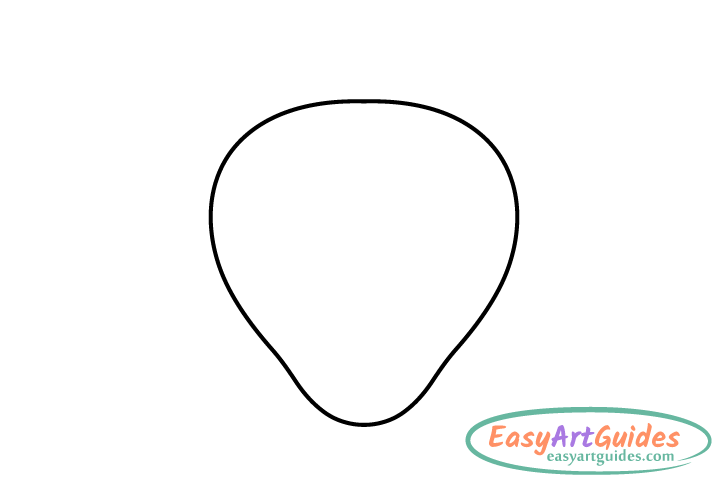
Begin by fist outlining the strawberry’s main shape. When placing it on the page/drawing area be sure to leave a little bit of room at the top for the crown and stem.
Make the strawberry’s outline generally wider towards the top and narrower as it goes down with a bit of a bump at the bottom. This type of shape is fairly characteristic of strawberries so if you get this part right your drawing will already start to look like what it’s supposed to.
Step 2 – Draw the Crown at the Top
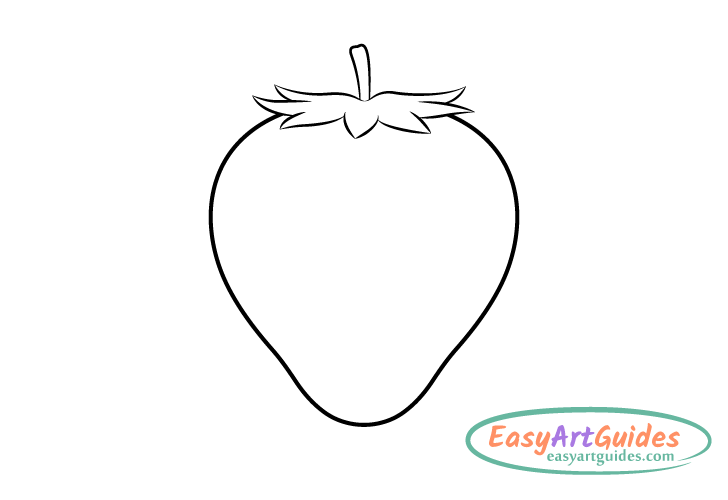
When adding the crown you will need to erase a bit of the strawberries outline (at the top).
The crown is made up of sepals (little leaves). Try and draw these of slightly different shapes and sizes as shown in the example. You can outline each with just two curved or wavy lines.
Once you’ve drawn the crown add the stem coming out of it’s center. Make it narrower towards the bottom and wider towards the top.
For drawing a tomato with it’s crown see:
How to Draw a Tomato in 4 Easy Steps
Step 3 – Draw the Seeds & Finish the Line Drawing

To finish the line drawing add the seeds. Try and draw these in a way that makes them sort of “flow” along the shape of the strawberry. You can do this by positioning them at angles that somewhat matches the outer curves of the berry, especially near the edges.
Draw the seeds closer to the middle with less of an angle (closer to being vertical) and make their shapes wider. Drawing them in such a way will give the berry a more three dimensional appearance.
Once you are done with the seeds go over your lines with a black pen or a thin black marker. Alternatively you can just darken them by pressing harder on the pencil.
Step 4 – Color the Strawberry Drawing
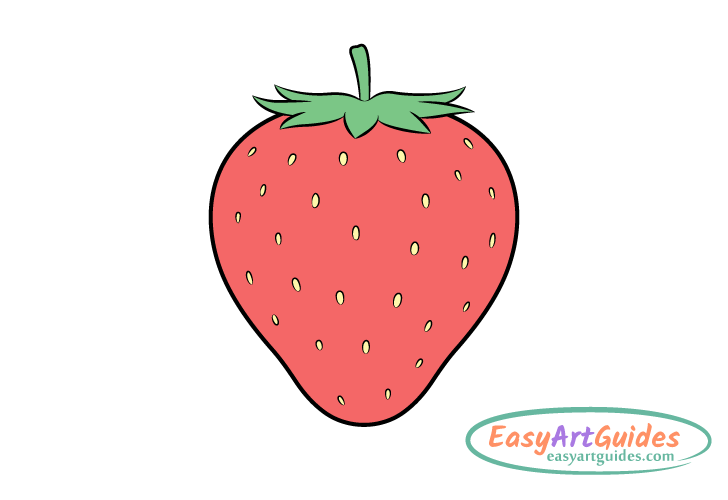
Finally, for some basic color you can simply make the strawberry red, the crown and stem green, and the seeds yellow. Markers, paints and colored pencils can all be good and easy options for doing this.
Once done coloring you should be finished with the tutorial.
Conclusion
While the strawberry drawing shown as the example is quite simple, the final result still looks really nice. This is in large part due to giving it a shape that is very characteristic of such a berry and to drawing the seeds in a way that gives it a more 3d appearance.
If you enjoyed this tutorial and liked the detailed step by step breakdown and tips you may also want to try some of the following:


