How to Draw a Goldfish (Easy Step by Step Guide)
This tutorial shows how to draw a goldfish with easy to follow steps. It includes beginner friendly illustrated examples and basic instructions.
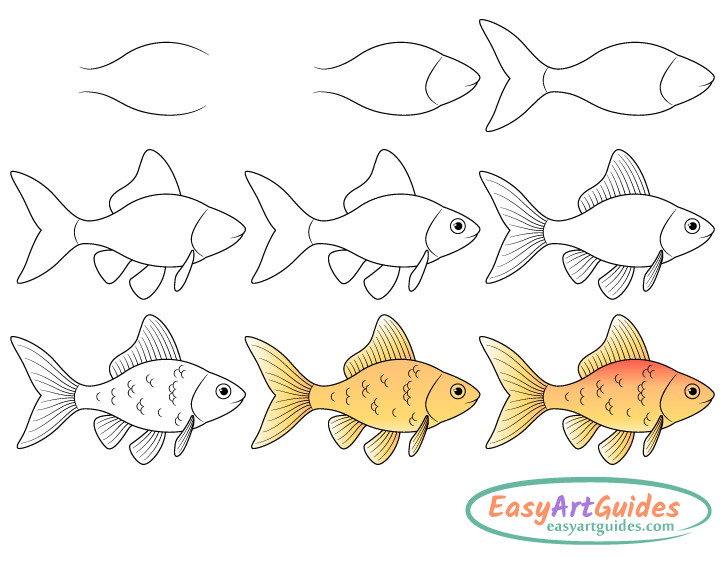
The goldfish shown as the example has a good amount of detail but overall the tutorial is not too complicated. The details breakdown of the drawing process makes it fairly easy to follow along. You can see a preview of the included steps in the image above.
Start in pencil and use it for most of the drawing stages. You can darken your lines before coloring (in step seven). Before then try and keep them light as you will need to erase a small part of the drawing in step four. Light lines will also make it easier to fix mistakes.
Step 1 – Draw the Body of the Goldfish
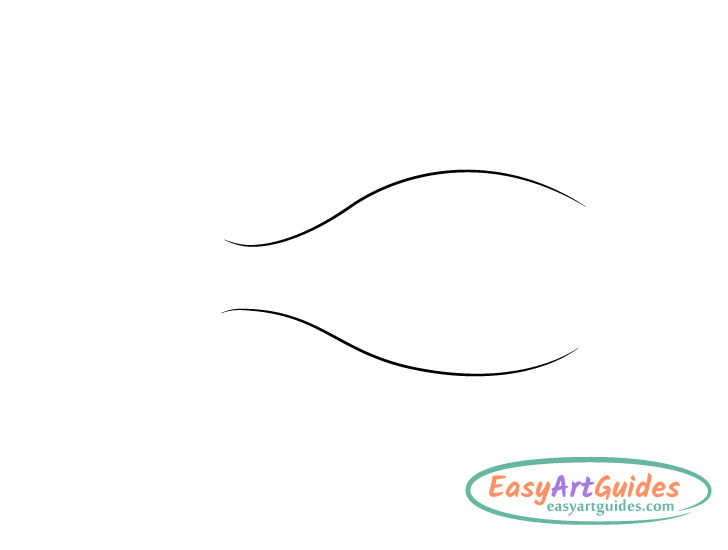
Start the drawing by outlining the shape of the goldfish’s body. Draw it wider near the middle and narrower towards the head and much narrower towards the tail.
Step 2 – Draw the Head
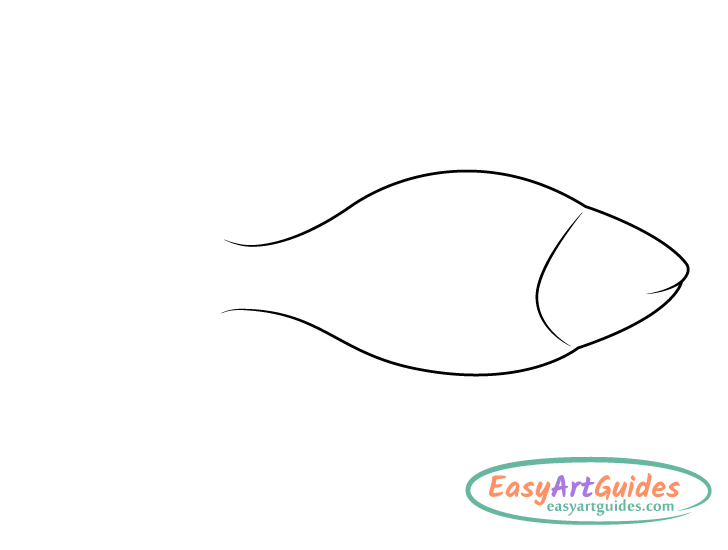
You can define the head in three curves. Draw the first one between it and the body. Add the next curve running down from the top of the body to define the upper part of the head. It should eventually curve back towards the body to create the mouth. Finally, define the lower part of the head with a curve running down form the bottom of the mouth towards the lower end of the body.
Make the head’s overall shape narrower as it goes out towards it’s front end.
Step 3 – Draw the Tail
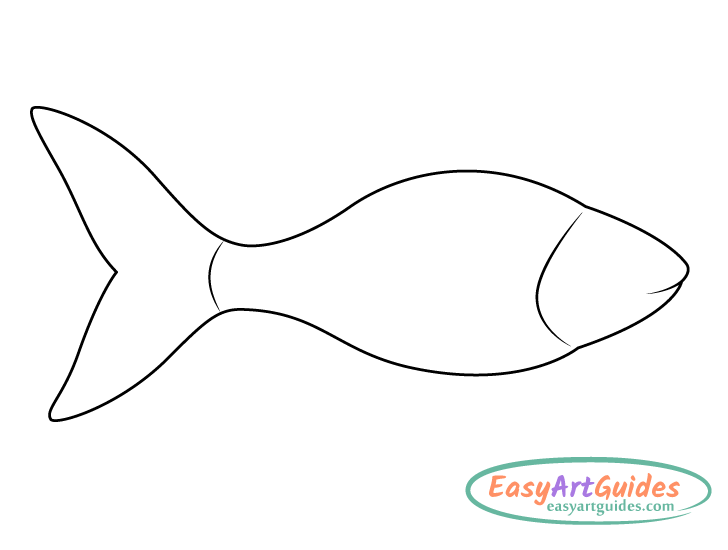
Draw the tail curving backwards with a split in the middle. Make it fairly tall in relation to the body. Also, draw a little curve around it’s base.
Step 4 – Draw the Fins
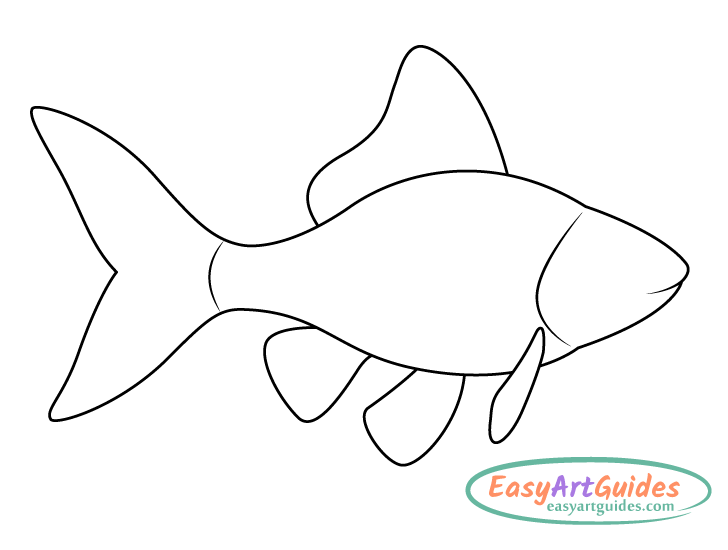
Add the fins starting with the largest one at the top. It should have a taller section towards the the head and lower one towards the tail. Afterwards, add two fins on the bottom with one close to the tail and the other near the middle of the body. Finally add the last and smallest fin near the head. You can erase the part of the body that it overlaps.
For drawing other kind’s of fins see:
How to Draw a Dolphin Step by Step
Step 5 – Draw the Eye
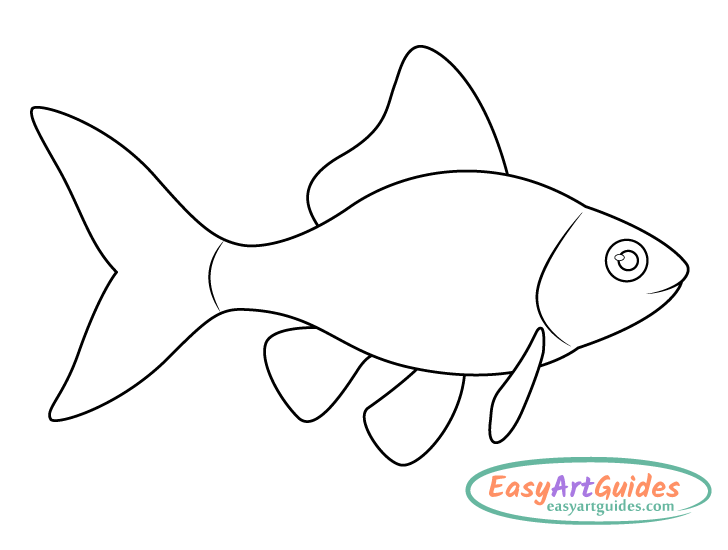
Make the eye round and draw another smaller circle inside it to define the iris. Slightly overlapping the iris add a small oval shaped highlight to help show that the eye is shiny and reflective.
Step 6 – Draw the Scales & Fin Details
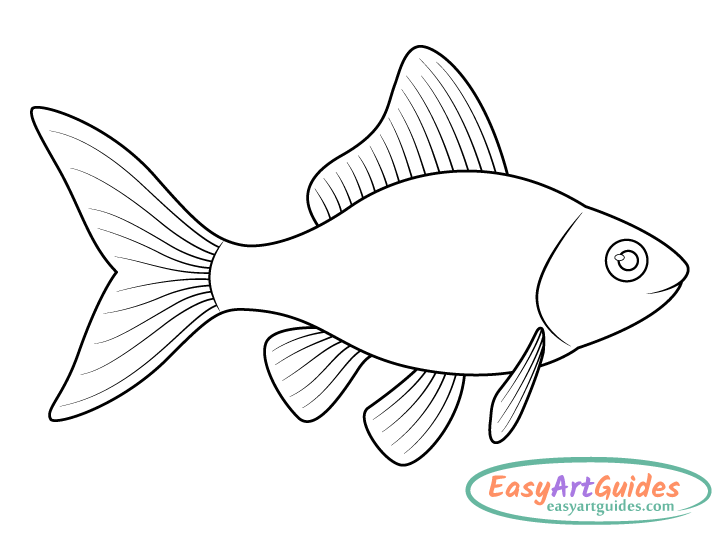
Draw some lines along the fins and tail in a way where they flow along the shapes of their respective parts (see example). These are the bones that are visible due to the fins/tail being semi-transparent.
Step 7 – Draw the Scales & Fin Details
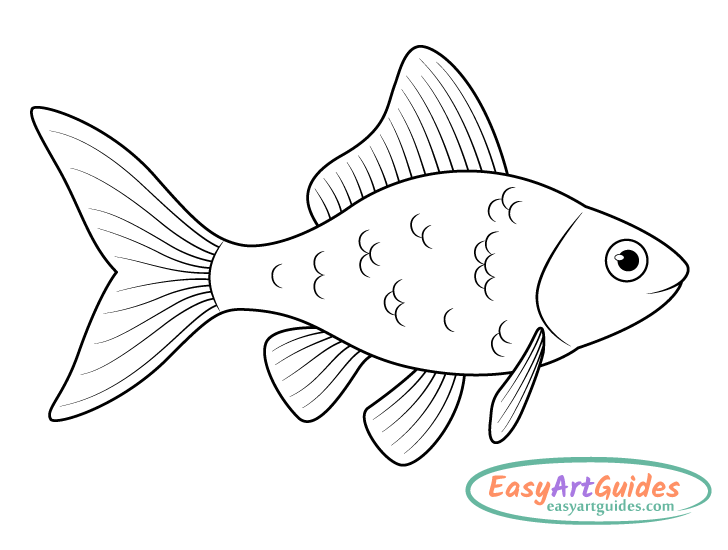
Create a hint of scales by drawing some half-circles along the fishes body. Draw some stacked together and a few on their own (see example).
Once done with the above go over your lines with either a black pen/marker or darken them with the pencil. Afterwards, also fill in the iris of the eye with either black or dark pencil shading.
Step 8 – Color the Goldfish a Yellow Orange
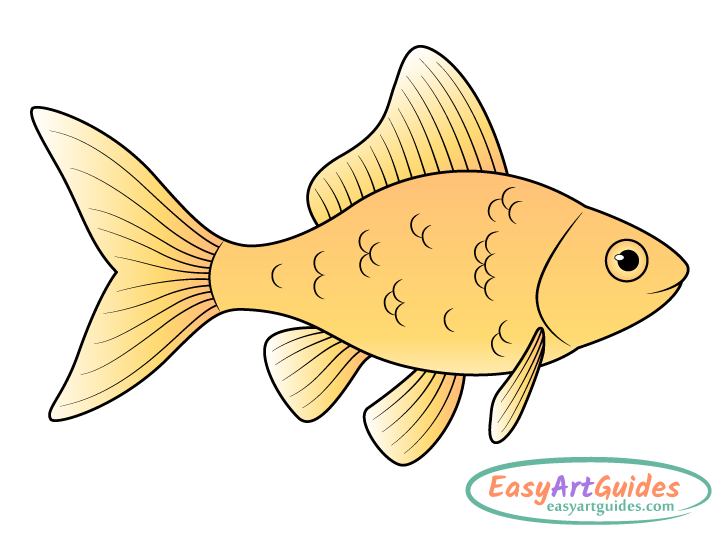
To color the goldfish colored pencils can be a good and easy option. Use a darker orange along the it’s back and gradually make it lighter (turning into yellow) as it goes down to the belly.
Draw the fins and tail in a way where they have darker orange at their base that gradually gets lighter (almost white) as it goes towards their outer ends.
Step 9 – Add Some Red Along the Back & Around the Eye
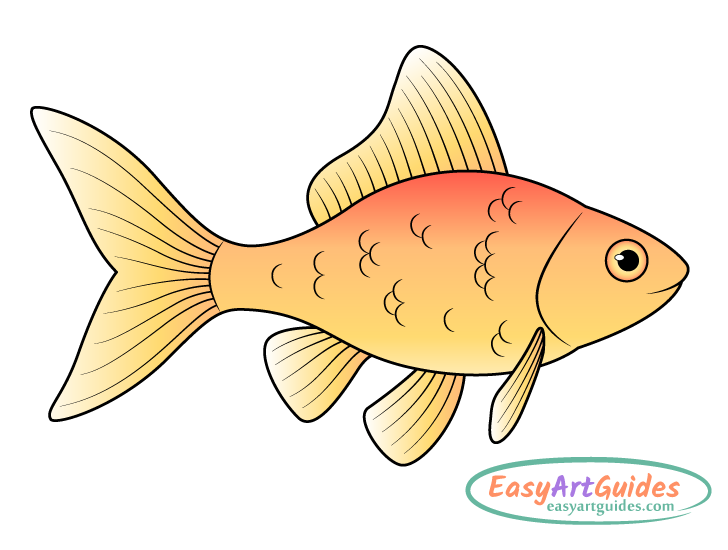
To finish the drawing add some red along the goldfish’s back and around it’s eye.
Make the red along the back lighter as it goes down and blend the red around the eye so that it has a smooth transition into the orange.
Conclusion
Drawing a slightly stylized goldfish like the one shown in this tutorial is not too complicated. A good approach is to start with an outline of the the major parts of it’s body and then to add the smaller details (as was done throughout the steps).
Hopefully you’ve found the guide helpful and easy to follow.
For more similar step by step tutorials also see the following:


