How to Draw a Snowman (Easy 6 Step Guide)
This guide shows a simple step by step approach to drawing a snowman. It provides detailed illustrated examples and easy to follow explanations.
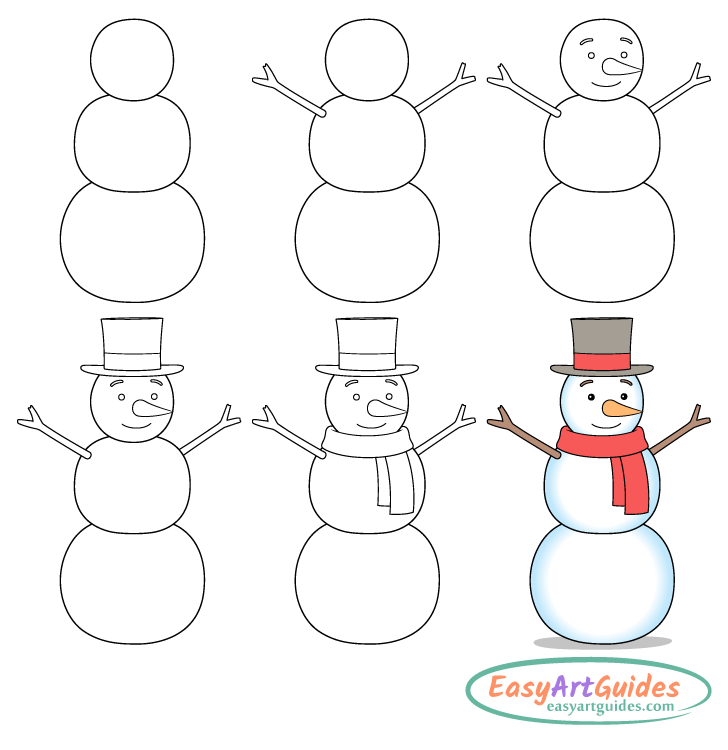
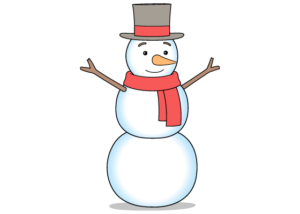
The snowman in the example is drawn with what could be called a “classic look”. Meaning that he has a carrot for a nose, sticks for arms and is wearing a top hat with a scarf.
The snowman is shown from a 3/4 view (slightly turned to one side) which is a good choice for this particular drawing. If for example you were to go with a front view instead the carrot would just look like a circle (not the best way to show off it’s shape).
Start the drawing using a regular pencil and make light lines that you can easily erase. You will need to do so in a couple of the steps (when adding the hat, scarf and one of the arms). You can darken your lines by tracing over them once you have all parts of the snowman outlined.
Step 1 – Draw the Snowman’s Body
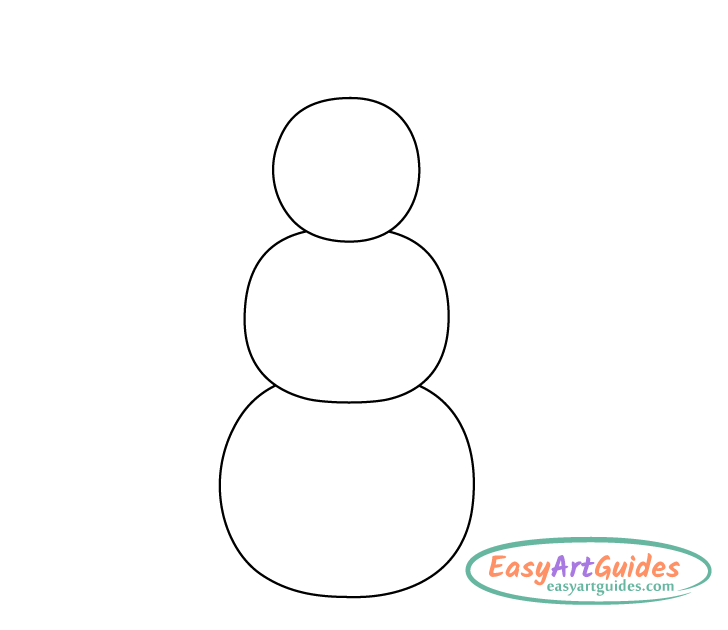
Begin by drawing the main body of the snowman. Show this as a stack of three large snowballs. Draw the largest one at the bottom followed by a smaller one in the middle and the smallest one on top.
Make the outlines of the snowballs fairly rounded on the sides but somewhat flatter on their tops and bottoms. This will make it look like they can actually be stacked together without rolling off of one another. Also, make the outlines slightly uneven and asymmetrical so that the snowballs look natural.
Step 2 – Draw the Arms
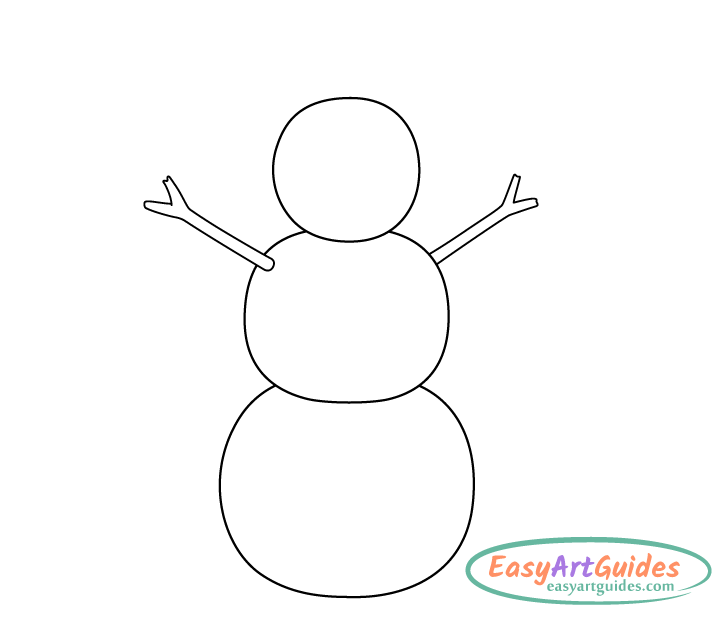
Sticking out of the body’s middle portion draw the arms. As already mentioned, in this example they are a pair of sticks. Draw the sticks angled upwards with splits on their ends.
Because the snowman is slightly turned to one side the base of the arm facing away from the viewer is hidden behind the body (right side of the drawing). The base of the opposite arm (turned towards the viewer) will instead “cut” into the body’s outlined and you can erase a little bit of the snowman’s middle portion when adding it in.
Step 3 – Draw the Face
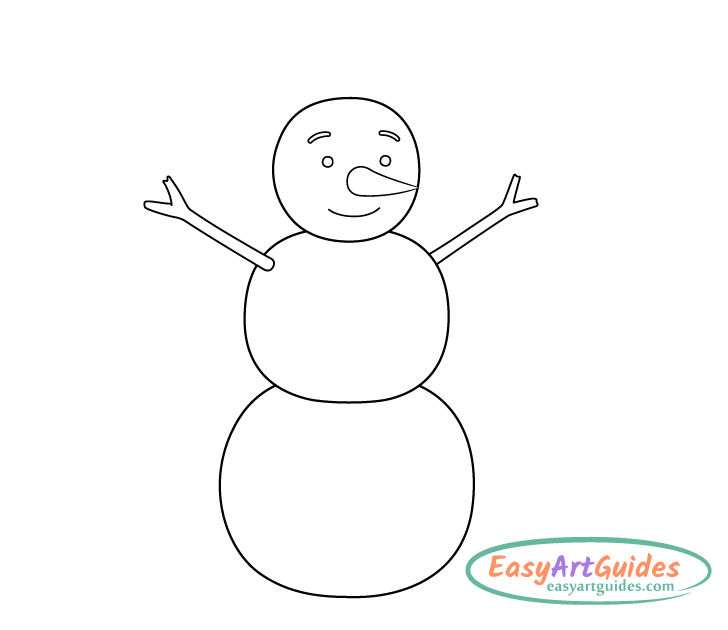
The eyes are a pair of charcoals. Draw these to be somewhat circular in shape but not perfectly so. Above the eyes draw a pair of slightly curved eyebrow (these can be small sticks).
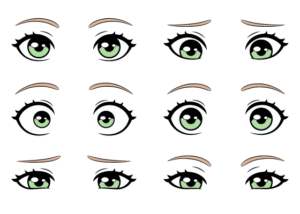
For drawing the eyes of a person (in a cartoon style) see:
8 Examples of How to Draw Eye Expressions
Again, as already mentioned, draw the nose as a carrot pointing to one side. You can also give the carrot a slightly upwards curve.
Draw the mouth as a simple upwards curve to give the snowman a smile.
With the face added you should have a basic snowman that you can then “dress up”.
Step 4 – Draw the Hat
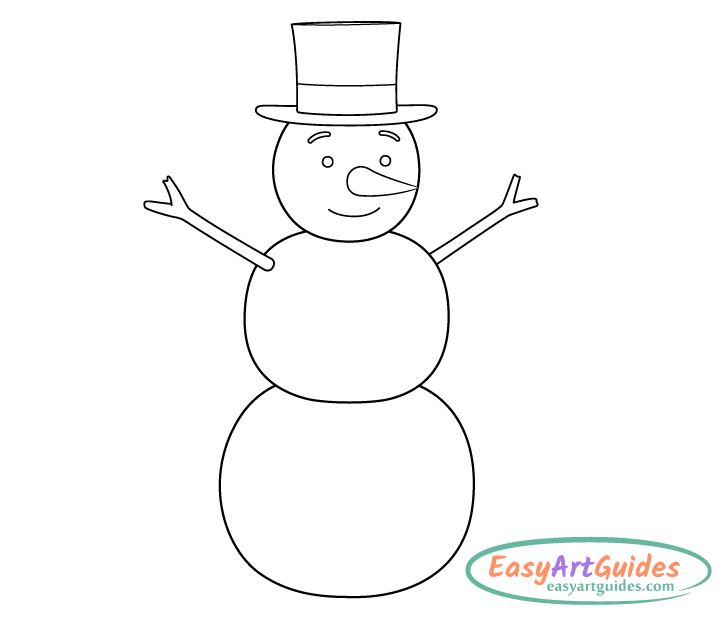
Slightly covering the top of the head add the a top hat. Draw the sides of it’s brim with slight upwards curves and draw it’s top (the crown) similar to a cylinder that gets wider as it goes up. Afterwards also add a band just above the brim.
Erase the part of the head that’s hidden by the hat when adding it into the drawing.
Step 5 – Draw the Scarf
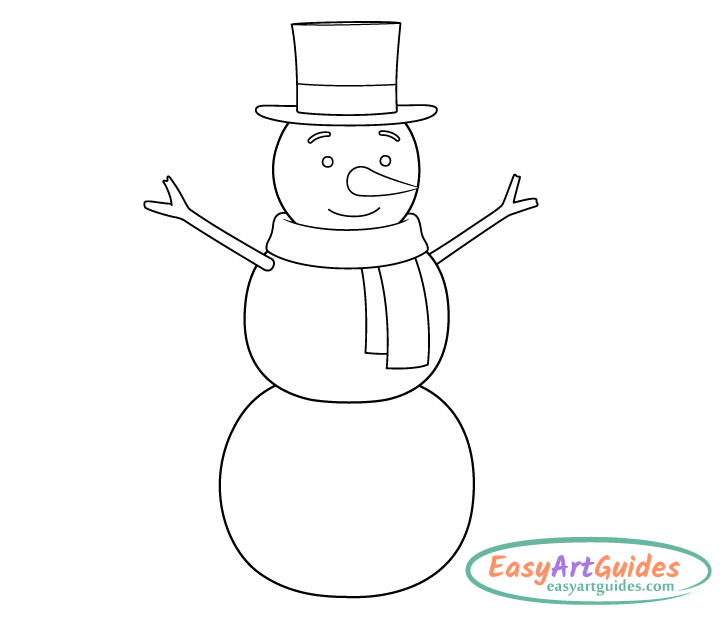
For the last part of the drawing you can also give the snowman a scarf. First, add the part that wraps around between the head and the body as shown in the example. Next, add the two ends hanging out from underneath it with one tucked under the other.
When adding the scarf you will again need to erase the parts of the body that it covers. You can do this either beforehand or after you have it outlined.
Once you’ve added the scarf and cleaned up any excess lines trace over your drawing with a black pen, marker or darker pencil lines.
For drawing a more detailed scarf see the following tutorial:
How to Draw a Scarf Step by Step
Step 6 – Color the Snowman
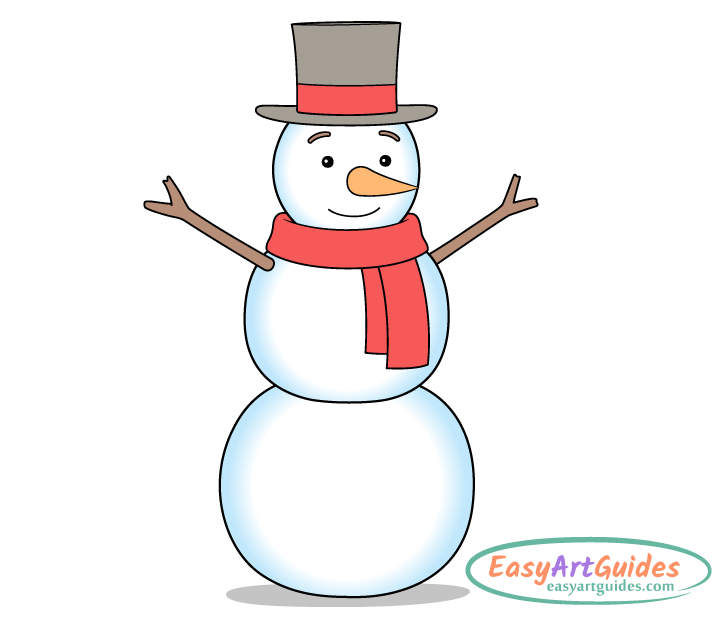
An easy way to color the snowman is with colored pencils but you can also use markers for some of it’s parts to get brighter looking colors.
Make the hat grey, the band around it and the scarf red, the nose orange and the arms/eyebrows brown.
Make the eyes black but leave tiny white spots inside of them (for the reflections).
To make the snowman look like it’s actually sitting on top of something add grey shadow underneath it. Unlike the rest of the drawing the shadow does not need an outline (so that it looks soft).
For a simper drawing you can leave the body of the snowman white but if you want to make it look more interest use a colored pencil to blend a soft blue around the edges of each of the snowballs (as shown in the example).
Conclusion
Drawing a snowman is somewhat similar to building one. First, construct the body, then add the details of the face and finally dress it up. Not only is this fairly intuitive it’s also a good overall approach to drawing. Generally you want to start with the largest and/or most important parts of your subjects and then move on to the smaller and less important details.
For more similar tutorial also see the following:


